Tutorial
Get Connected
Now that you have MilestonePSTools installed, it's time to login and start using it. If you haven't installed it yet, take a look at the detailed Installation page first.
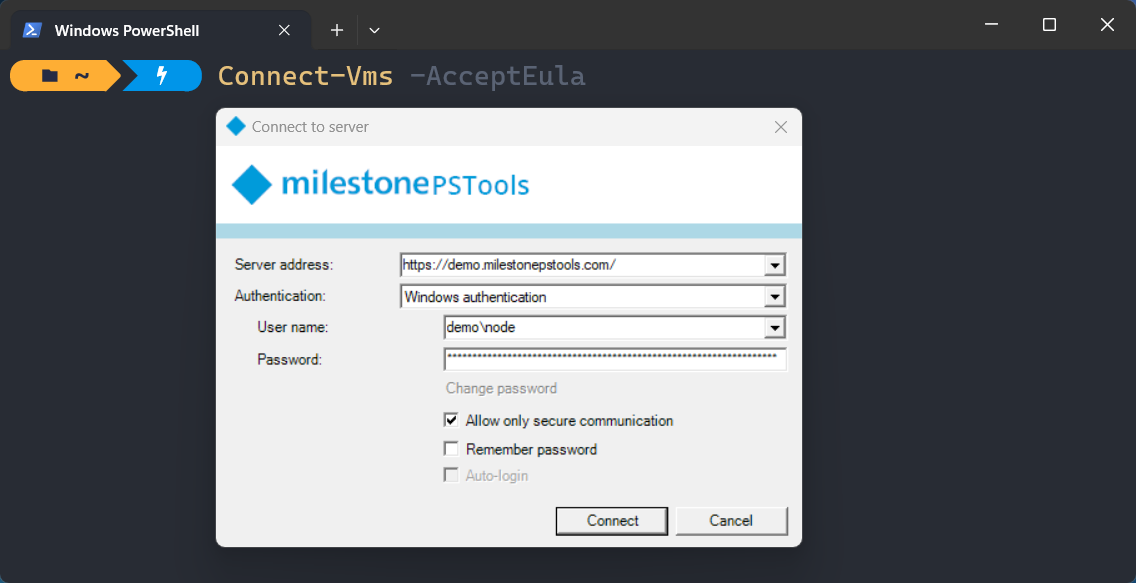
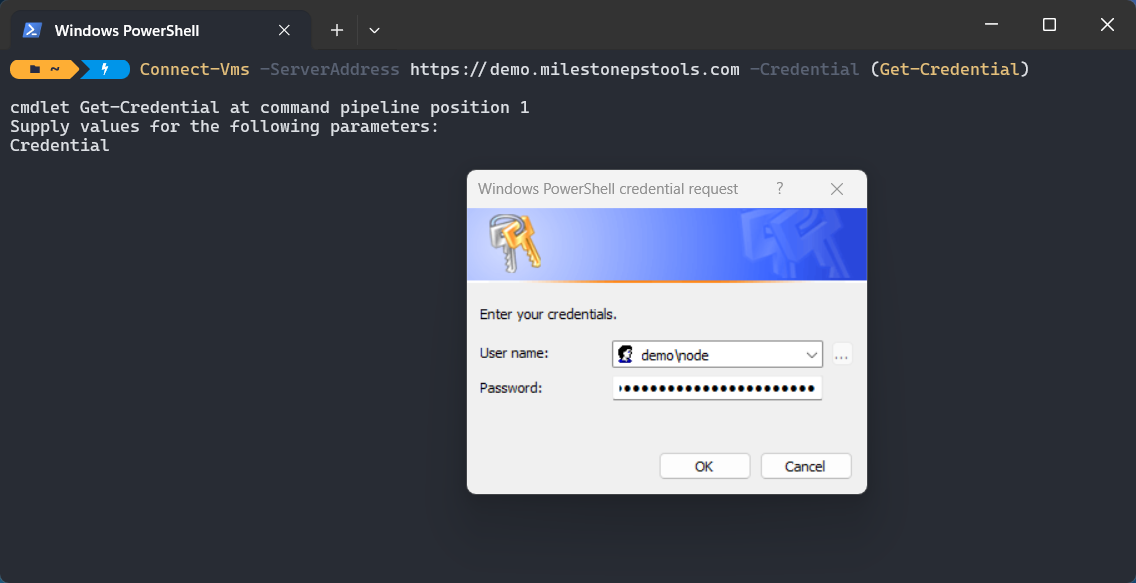
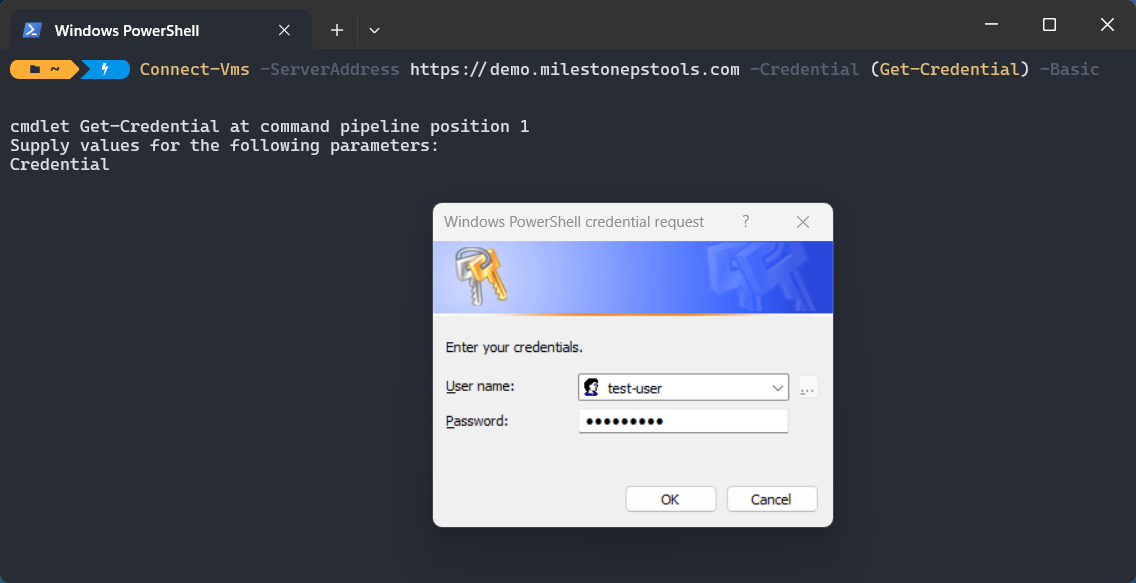
To login to your Milestone XProtect Management Server, you will need to use
Connect-ManagementServer. For interactive use, my favorite method is to use
the -ShowDialog switch parameter. Using this parameter will pop-up a familiar
login dialog with support for all available user types.
Note
The -AcceptEula switch is required only the first time your Windows user
calls Connect-ManagementServer. After that, a flag is set in
%appdata%\MilestonePSTools.
Generate a camera report
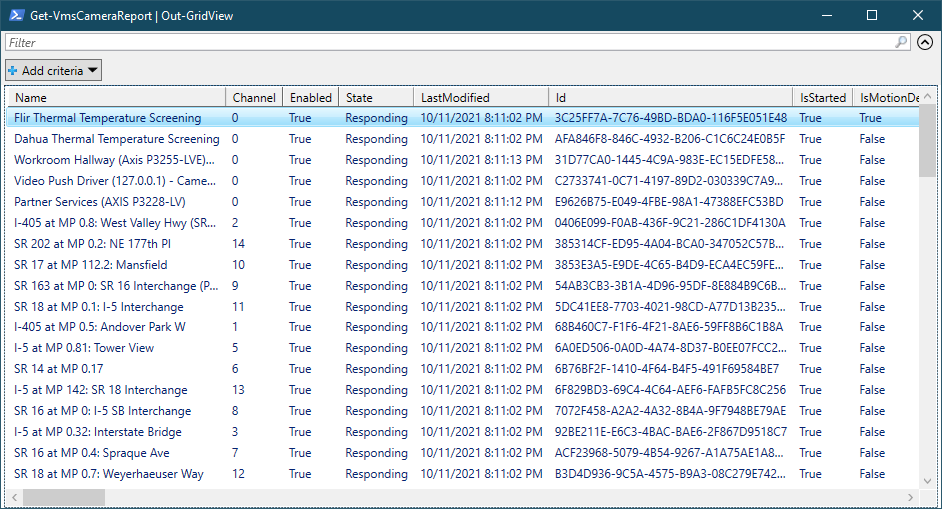
Now that you're logged in, one of the most useful features of MilestonePSTools
is the built-in command, Get-VmsCameraReport. This command will return a
collection of rows representing configuration and status for each camera. You
can combine this command with Export-Csv which is included with PowerShell
and makes it easy to send a collection of data to a CSV file. In the first
example, we're "piping" the results to the Out-GridView cmdlet with the "|"
symbol so that we can interact with the results in a user interface without the
need to have Excel installed. See the "Export to CSV" tab for an example of how
to use the built-in PowerShell cmdlet Export-Csv to quickly generate a CSV
file.
Exploring the results
The table below is the actual output of the first command above, with the retention information and recording statistics for the last week included.
| Name | Channel | Enabled | State | LastModified | Id | IsStarted | IsMotionDetected | IsRecording | IsInOverflow | IsInDbRepair | ErrorWritingGOP | ErrorNotLicensed | ErrorNoConnection | StatusTime | GpsCoordinates | HardwareName | HardwareId | Model | Address | Username | Password | HTTPSEnabled | MAC | Firmware | DriverFamily | Driver | DriverNumber | DriverVersion | DriverRevision | RecorderName | RecorderUri | RecorderId | LiveStream | LiveStreamDescription | LiveStreamMode | ConfiguredLiveResolution | ConfiguredLiveCodec | ConfiguredLiveFPS | CurrentLiveResolution | CurrentLiveCodec | CurrentLiveFPS | CurrentLiveBitrate | RecordedStream | RecordedStreamDescription | RecordedStreamMode | ConfiguredRecordedResolution | ConfiguredRecordedCodec | ConfiguredRecordedFPS | CurrentRecordedResolution | CurrentRecordedCodec | CurrentRecordedFPS | CurrentRecordedBitrate | RecordingEnabled | RecordKeyframesOnly | RecordOnRelatedDevices | PrebufferEnabled | PrebufferSeconds | PrebufferInMemory | RecordingStorageName | RecordingPath | ExpectedRetentionDays | PercentRecordedOneWeek | MediaDatabaseBegin | MediaDatabaseEnd | UsedSpaceInGB | ActualRetentionDays | MeetsRetentionPolicy | MotionEnabled | MotionKeyframesOnly | MotionProcessTime | MotionManualSensitivityEnabled | MotionManualSensitivity | MotionMetadataEnabled | MotionExcludeRegions | MotionHardwareAccelerationMode | PrivacyMaskEnabled |
|---|---|---|---|---|---|---|---|---|---|---|---|---|---|---|---|---|---|---|---|---|---|---|---|---|---|---|---|---|---|---|---|---|---|---|---|---|---|---|---|---|---|---|---|---|---|---|---|---|---|---|---|---|---|---|---|---|---|---|---|---|---|---|---|---|---|---|---|---|---|---|---|---|---|---|---|---|
| Learning & Performance (Bosch 7000VR) | 0 | TRUE | Responding | 10/11/2021 20:11 | 004962D3-B129-4099-8C6E-0F8BFF8385B0 | TRUE | FALSE | FALSE | FALSE | FALSE | FALSE | FALSE | FALSE | 10/23/2021 18:02 | 45.417055572316, -122.732103059925 | Learning & Performance (192.168.32.7) | B7E7FF77-C8A7-4B23-9B69-F1E70EBDFC80 | FLEXIDOME IP starlight 7000 VR | http://192.168.32.7/ | service | NotIncluded | FALSE | 00075F9BFCB4 | 760 | Bosch | Bosch 1-channel device | 676 | DevicePack: 11.7a, Device Pack, Build: 11.7a.34 | 1.77 | Milestone Demo | http://35.162.125.60:7563/ | 72080191-D39D-4229-B151-65BCD740C393 | Video> stream 1 | Video stream 1 | WhenNeeded | MP 720p 50/60 | 12 | 1088x1920 | MPEG | 15 | 1.7 | Video stream 1 | Video stream 1 | WhenNeeded | MP 720p 50/60 | 12 | 1088x1920 | MPEG | 15 | 1.7 | TRUE | FALSE | TRUE | TRUE | 3 | TRUE | Local default | D:\MediaDatabase\DEF84B4A-1E7A-4F99-AC5F-671AE76D520B | 30 | 1.8 | 9/23/2021 17:13 | 10/22/2021 22:54 | 25.3 | 29.23651263 | FALSE | TRUE | TRUE | Ms500 | FALSE | 100 | TRUE | FALSE | Automatic | FALSE | ||
| FLIR Systems FLIR A400 (192.168.32.23) - Camera 2 | 1 | TRUE | Responding | 10/11/2021 20:11 | 548CFB0F-6602-4563-991F-F11322CE3E54 | TRUE | FALSE | FALSE | FALSE | FALSE | FALSE | FALSE | FALSE | 10/23/2021 18:02 | Unknown | FLIR Systems FLIR A400 (192.168.32.23) | BC801DAE-552D-4F81-AD2D-6B5B6322E25D | FLIR Systems FLIR A400 | http://192.168.32.23/ | fliruser | NotIncluded | FALSE> | 00407F109EAE | 2.23.28 | ONVIF | ONVIF Conformant Device (2-16 channels) | 407 | DevicePack: 11.7a, Device Pack, Build: 11.7a.34 | 1.91 | Milestone Demo | http://35.162.125.60:7563/ | 72080191-D39D-4229-B151-65BCD740C393 | Video> stream 01 | Video stream 1 | WhenNeeded | 1280x960 | H.264 Baseline Profile | 30 | 1280x960 | MPEG | 9 | 0.9 | Video stream 01 | Video stream 1 | WhenNeeded | 1280x960 | H.264 Baseline Profile | 30 | 1280x960 | MPEG | 9 | 0.9 | TRUE | FALSE | TRUE | TRUE | 3 | TRUE | Local default | D:\MediaDatabase\DEF84B4A-1E7A-4F99-AC5F-671AE76D520B | 30 | 0.2 | 9/23/2021 19:35 | 10/23/2021 16:07 | 0.77 | 29.85565765 | FALSE | TRUE | TRUE | Ms500 | FALSE | 100 | TRUE | FALSE | Automatic | FALSE |
| FLIR Systems FLIR A400 (192.168.32.23) - Camera 1 | 0 | TRUE | Responding | 10/11/2021 20:11 | AC3098DE-C381-4B98-B6AE-532521D28438 | TRUE | FALSE | FALSE | FALSE | FALSE | FALSE | FALSE | FALSE | 10/23/2021 18:02 | Unknown | FLIR Systems FLIR A400 (192.168.32.23) | BC801DAE-552D-4F81-AD2D-6B5B6322E25D | FLIR Systems FLIR A400 | http://192.168.32.23/ | fliruser | NotIncluded | FALSE> | 00407F109EAE | 2.23.28 | ONVIF | ONVIF Conformant Device (2-16 channels) | 407 | DevicePack: 11.7a, Device Pack, Build: 11.7a.34 | 1.91 | Milestone Demo | http://35.162.125.60:7563/ | 72080191-D39D-4229-B151-65BCD740C393 | Video> stream 01 | Video stream 1 | WhenNeeded | 640x480 | H.264 Baseline Profile | 30 | 640x480 | MPEG | 29 | 2.8 | Video stream 01 | Video stream 1 | WhenNeeded | 640x480 | H.264 Baseline Profile | 30 | 640x480 | MPEG | 29 | 2.8 | TRUE | FALSE | TRUE | TRUE | 3 | TRUE | Local default | D:\MediaDatabase\DEF84B4A-1E7A-4F99-AC5F-671AE76D520B | 30 | 0 | 9/24/2021 15:24 | 10/21/2021 16:41 | 0.61 | 27.0532151 | FALSE | TRUE | TRUE | Ms500 | FALSE | 100 | TRUE | FALSE | Automatic | FALSE |
| Right Elevator (AXIS P3227-LV) | 0 | TRUE | Responding | 10/15/2021 11:34 | 8CD5B5B9-8ABB-4702-99C0-018F82FB8B13 | TRUE | FALSE | FALSE | FALSE | FALSE | FALSE | FALSE | FALSE | 10/23/2021 18:02 | 45.4171310677097, -122.7320429689 | Right Elevator (192.168.32.30) | C1C9D1A9-0763-430B-917C-F6DB27F2F453 | AXIS P3227-LV Network Camera | http://192.168.32.30/ | root> | NotIncluded | FALSE | ACCC8EBD4F89 | 10.2.0 | AXIS | AXIS 8 channel device | 713 | DevicePack: 11.7a, Device Pack, Build: 11.6a.23024761 | 1.62 | Milestone Demo | http://35.162.125.60:7563/ | 72080191-D39D-4229-B151-65BCD740C393 | Video> stream 1 | Video stream 1 | WhenNeeded | 1920x1080 | H.264 | 15 | 1920x1080 | MPEG | 15 | 0.1 | Video stream 1 | Video stream 1 | WhenNeeded | 1920x1080 | H.264 | 15 | 1920x1080 | MPEG | 15 | 0.1 | TRUE | FALSE | TRUE | TRUE | 3 | TRUE | Local default | D:\MediaDatabase\DEF84B4A-1E7A-4F99-AC5F-671AE76D520B | 30 | 2.1 | 9/23/2021 17:33 | 10/22/2021 23:29 | 3.52 | 29.24743492 | FALSE | TRUE | TRUE | Ms500 | FALSE | 100 | TRUE | FALSE | Automatic | FALSE |
As you can see, the output from Get-VmsCameraReport is extensive! You'll
find information about the state of the camera, including a generic
Responding, Stopped, or Not Responding state, as reported by the Event
Server. You will also find detailed state information directly from the
Recording Server, assuming your PowerShell session was able to connect to the
Recording Server(s) on port 7563 (default).
In addition to state information, you'll find configuration details such as the motion detection settings, recording settings and path, device make, model and firmware, expected and actual resolution, current bitrate and FPS and more!
In this sample, we've included additional information in the report by adding
the -IncludeRetentionInfo and -IncludeRecordingStats switches. The former
will result in a query for the first and last recorded sequences for all
cameras in the report. The latter will retrieve the previous 7 days worth of
recording sequences to work out what percentage of time was recorded.
Save and share
The output of Get-VmsCameraReport is a collection of [pscustomobject]'s.
If you want to save these to a file, the easiest method is to use Export-Csv
which is a command that is included in PowerShell. There are 3rd party
PowerShell modules like ImportExcel for
saving data to Excel, and even reading Excel documents nearly as easy as using
the built-in Export-Csv command.
Automating tasks
With the full power of the MIP SDK at your fingertips, the next step is to
start automating regular tasks you might be spending a lot of time on. For
example, some VMS administrators are required to verify video retention
expectations are being met on a regular basis. Checking one camera at a time by
hand is very time consuming. One way to automate this task could be to run
Get-VmsCameraReport on a regular basis with the -IncludeRetentionInfo switch,
and then check the MediaDatabaseBegin column for the UTC timestamp of the
oldest recorded image for each camera, or simply use the ActualRetentionDays
column.
One way to automate this task is to use a PowerShell "scheduled job". These are fancy Scheduled Tasks which are easy to manage from PowerShell, and can run any PowerShell .PS1 script, or a "script block" on just about any interval or trigger.
Example
The example below will register a scheduled job and schedule it to run weekly on Mondays at midnight. To minimize complexity here, the scheduled job is based on a scriptblock ($script) which takes no parameters. The reports will be saved in C:\Reports, along with a transaction log file for troubleshooting. The job should be registered on the Management Server, but if you want to change the script to login to a remote Management Server instead, you can make changes to the script to suit your needs.
#Requires -RunAsAdministrator

# This is the scriptblock our scheduled job will be running. If you want to
# change what the script does, this is where you should start.
$script = {
    try {
        if (-not (Test-Path C:\reports)) {
            # Create our C:\Reports directory if it doesn't exist already
            $null = New-Item -Path C:\Reports -ItemType Directory
        }
        # This command generates a log file of all output from the script
        Start-Transcript -Path C:\Reports\log.txt

        Write-Host "Connecting to localhost. . ."
        Connect-ManagementServer -AcceptEula -ErrorAction Stop
        Write-Host "Connected to $((Get-VmsSite).Name)"

        Write-Host "Running Get-VmsCameraReport. . ."
        $reportOptions = @{
            IncludeRetentionInfo = $true
            IncludeRecordingStats = $true
        }
        $report = Get-VmsCameraReport @reportOptions
        Write-Host "Report completed"

        Write-Host "Saving $($report.Count) rows to $($path)"
        $dateString = (Get-Date).ToString('yyyy-MM-dd')
        $fileName = 'CameraReport_{0}.csv' -f $dateString
        $path = Join-Path C:\reports $fileName
        $report | Export-Csv -Path $path -NoTypeInformation
    }
    finally {
        Write-Host "Logging out. . ."
        Disconnect-ManagementServer
        Stop-Transcript
    }
}

# Our job trigger here will be based on a schedule: weekly, every 1 week on
# Monday, at midnight.
$jobTriggerParams = @{
    Weekly = $true
    WeeksInterval = 1
    DaysOfWeek = 'Monday'
    At = (Get-Date).Date
}
$trigger = New-JobTrigger @jobTriggerParams

<#
    Finally we can combine our script block and trigger to register a scheduled
    job. Our script is written to login to the Management Server at "localhost"
    using the current windows user, which means we MUST provide the user
    credentials of the user under which the scheduled job will run. Otherwise
    the script will not be able to authenticate with any network resource like
    the Management Server.

    You could also change the Connect-ManagementServer line in the script block
    to use a different ServerAddress and Credential if you want to.

    To avoid really long lines of PowerShell, we're using a strategy here
    called "splatting". First, we create a hashtable variable, $jobParams, with
    the name and value for all of the parameters on Register-ScheduledJob that
    we want to use. Then instead of specifying all these parameters on one line
    we can reference the $jobParams variable using "@" instead of "$" as you
    can see when we use Register-ScheduledJob below.
#>
$jobParams = @{
    Name = 'Run Get-VmsCameraReport'
    ScriptBlock = $script
    Trigger = $trigger
    Credential = Get-Credential
}
Get-ScheduledJob -Name $jobParams.Name -ErrorAction Ignore | Unregister-ScheduledJob
$job = Register-ScheduledJob @jobParams

# Just to make sure the report works, we'll run it right away
$job.Run() | Receive-Job -Wait -AutoRemoveJob